
Part 4 of this series will go over utilizing the previously configured domain-wide IPSec baseline by configuring secure firewall rules along with connection security rules to secure access to servers/services via user identity. In the Microsoft ecosystem, this is part of a concept known as “domain isolation“. Utilizing these features can be useful for a number of reasons, including ensuring that connections must originate from a domain-joined device, and providing additional access control on top of an application, such as an application running on a server that does not support centrally managed authentication.
Server-side Firewall Configuration
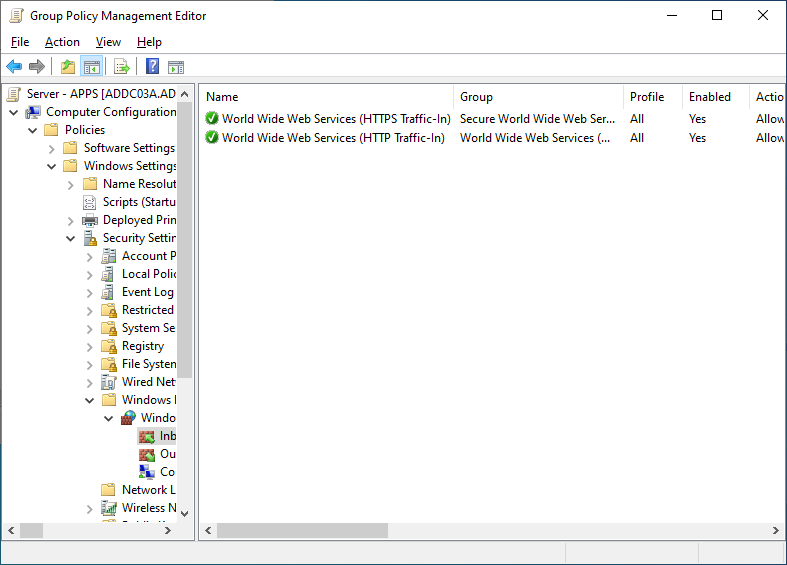
Starting with a server running services that should require authentication, create a new GPO or use an existing GPO already linked to it, and go to the Windows Firewall section. For this example, I am using a server named “APPS”, running IIS, with two web sites. The Default Web Site is running on ports 80 (HTTP) and 443 (HTTPS), and the second web site is running on port 8080 (HTTPS). I’ll be leaving the Default Web Site open for anyone to access, while securing the second web site.
First, add the builtin rules for HTTP and HTTPS.
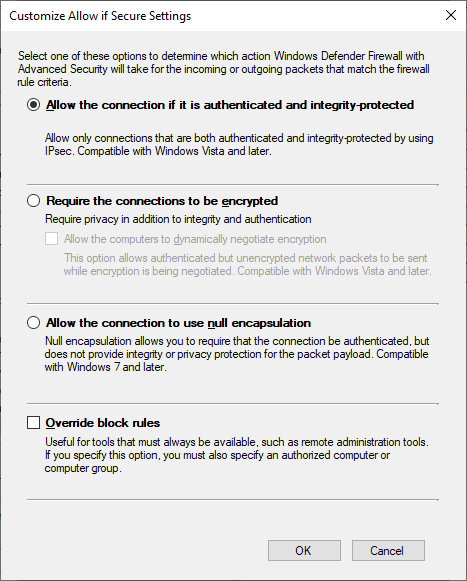
Next, create a custom rule for secure traffic to port 8080. In the wizard, select a custom rule, for all programs, for local TCP port 8080, with a scope of any source address, and a destination address of the server IP address. On the Action screen, select “Allow the connection if it is secure”, and click Customize. In the Customization dialog, leave it at the default of “Allow the connection if it is authenticated and integrity-protected”. This setting ensures that the connection is authenticated, but does not require it to be encrypted. Since the underlying traffic is already encrypted via the application protocol, requiring encryption at the transport layer is just extra overhead.
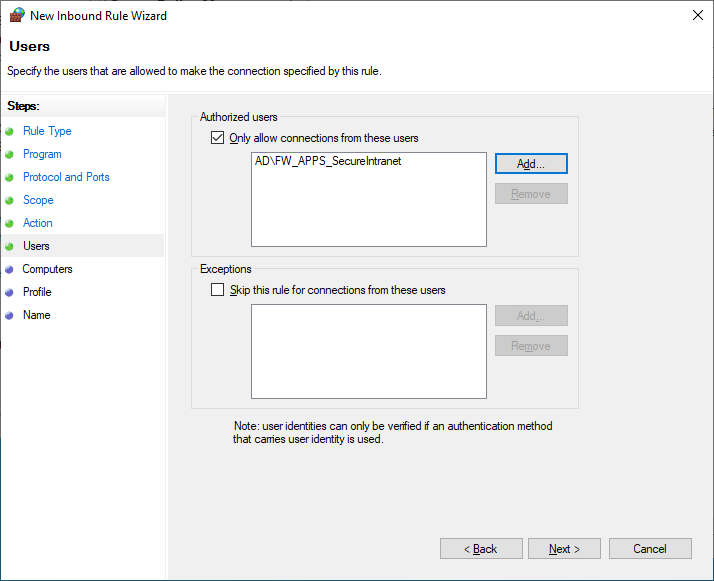
Next, configure Allowed Users to reference a previously created AD group containing only the user accounts that should be allowed access.
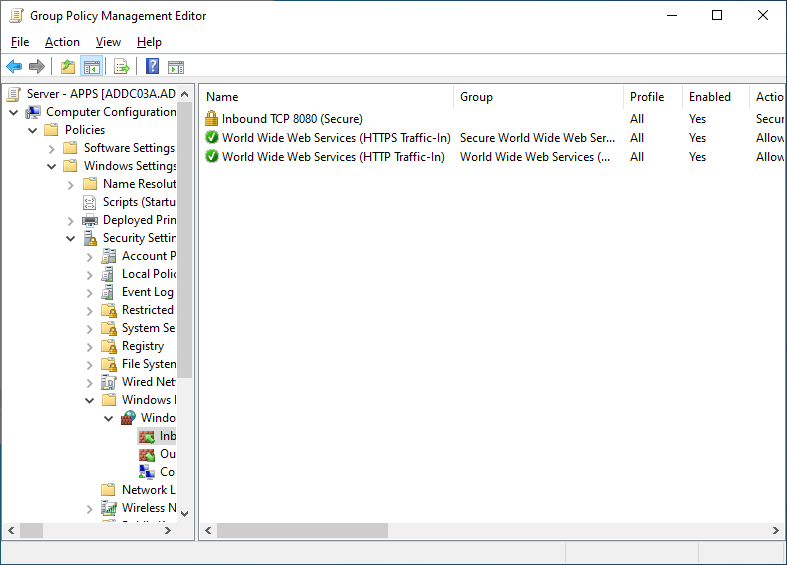
On the next page, leave the computers section unchanged, as in this example, I only want to control access via user identity. I’ll also leave the Profiles section unchanged, and then give the firewall rule a useful name, such as “Inbound TCP 8080 (Secure)”. After finishing the wizard, the new rule will be present, with a padlock icon, and the action column listing “Secure” instead of “Allow”.
Server-side Connection Security Rule Configuration
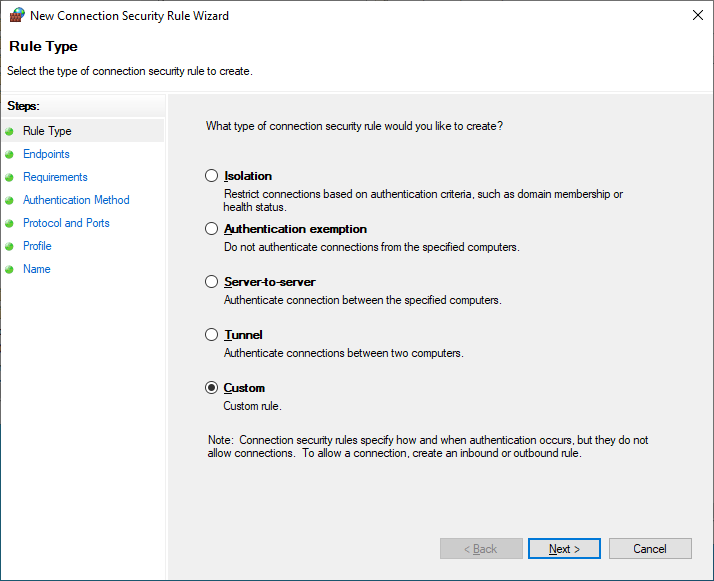
Next, create a Connection Security Rule to require authentication for port 8080. Start by right-clicking the Connection Security Rules section, clicking New Rule, and selecting Custom.
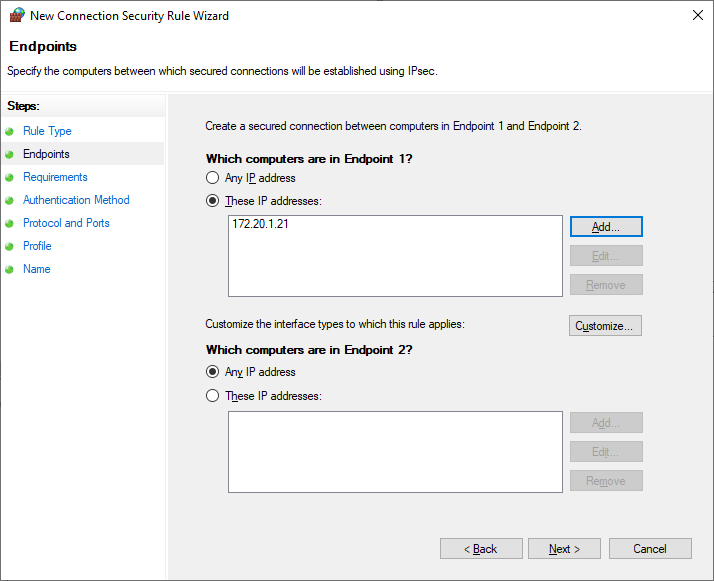
Since this should apply to all endpoints connecting to this server, configure endpoint 1 as the server IP address, and leave endpoint 2 set to Any.
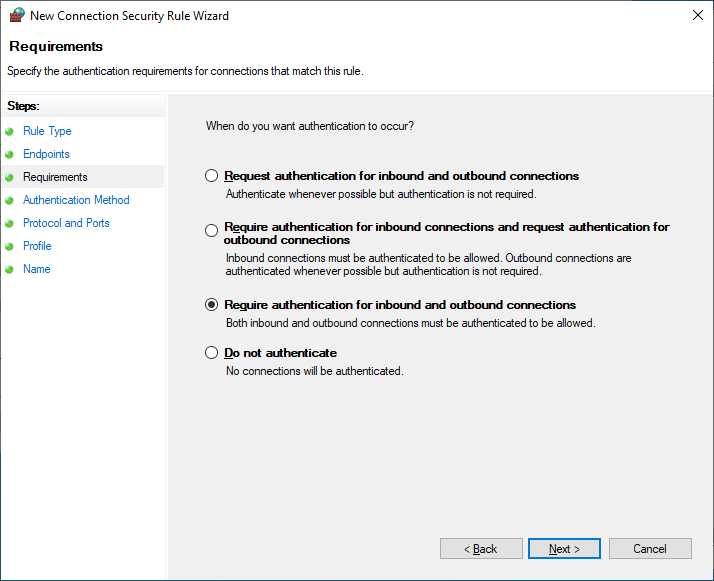
Next, configure the Requirements to require authentication for both inbound and outbound connections. This will require that both endpoints can successfully authenticate to each other to allow the connection.
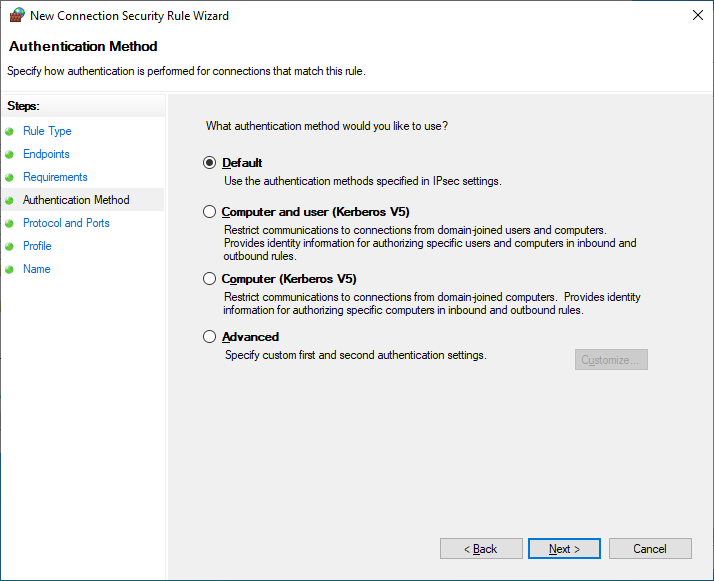
In the Authentication Method section, leave it as Default, as this will utilize the configuration set as default in the domain-wide IPSec configuration baseline policy, Computer Kerberos + User Kerberos. By utilizing Default here, this takes advantage of being able to easily make changes later; by updating what the “default” is in the top level IPSec configuration policy, later policies no longer need to updated if changes need to be made.
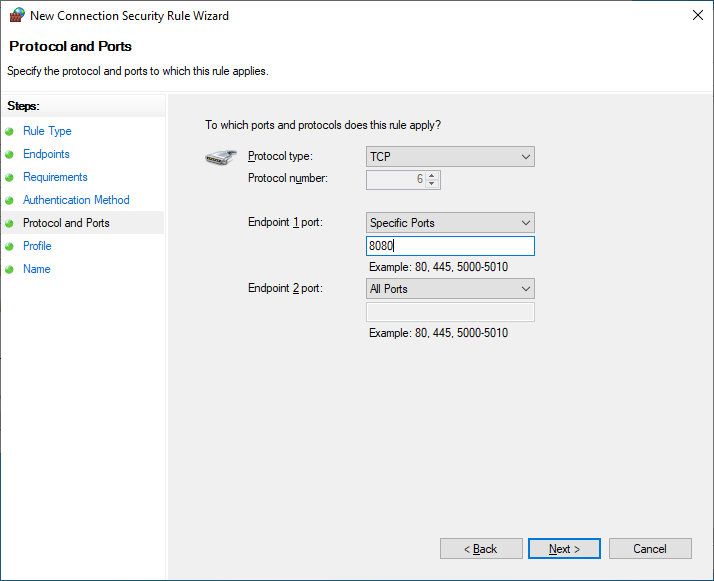
In the Protocol and Ports section, define endpoint 1 port as TCP 8080, and leave endpoint 2 port set to Any.
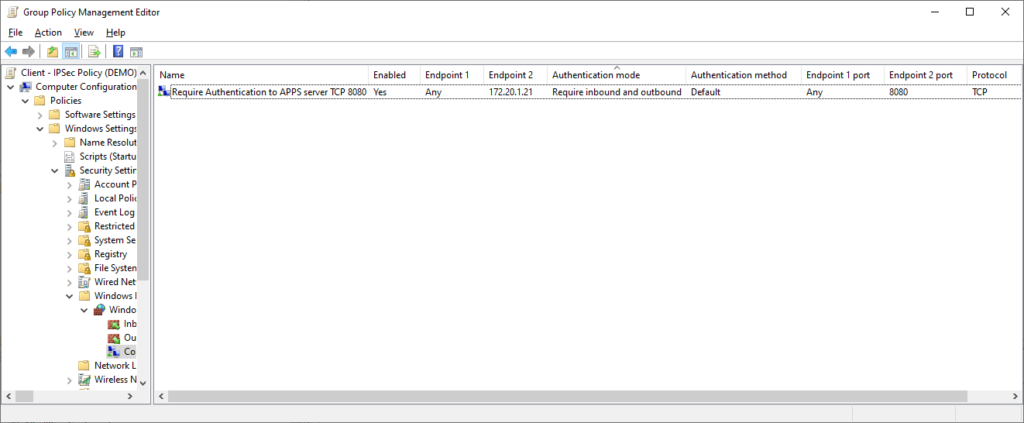
Finally, leave the Profile section as default, and give the rule a useful name, such as “Inbound TCP 8080 – Require Authentication”.
Client-side Connection Security Rule Configuration
Now that the server-side configuration is complete, a matching Connection Security Rule for traffic to this server/port needs to be configured on the client-side. In a top-level Client GPO, create a new Connection Security Rule, similar to the above configuration, except reversing the IP address and port specified in endpoint 1 and 2.
Testing/Verification
Now that both the server and client side configurations are complete, perform a gpupdate on both the server and a client, and log in to the client with a user account that is not in the group defined in the server-side firewall rule.
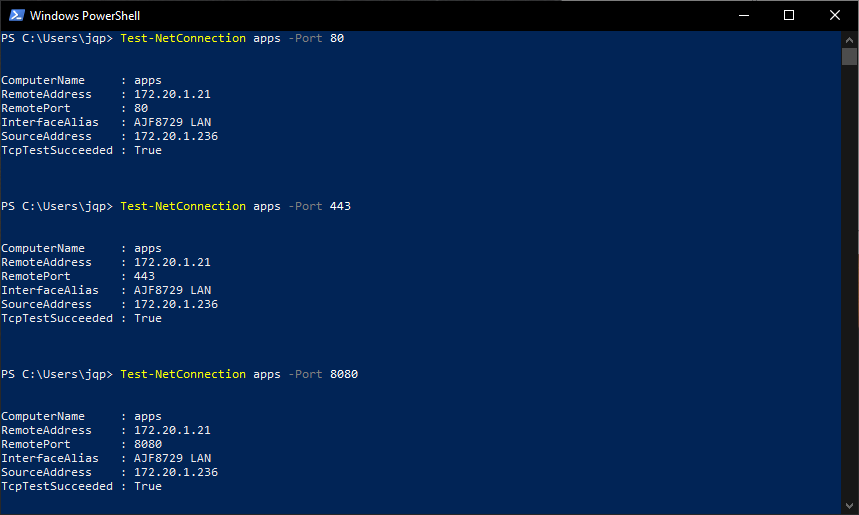
On the client, open the firewall management console (wf.msc) to verify the new Connection Security Rule is listed and applied, and test connectivity to ports 80, 443, and 8080.
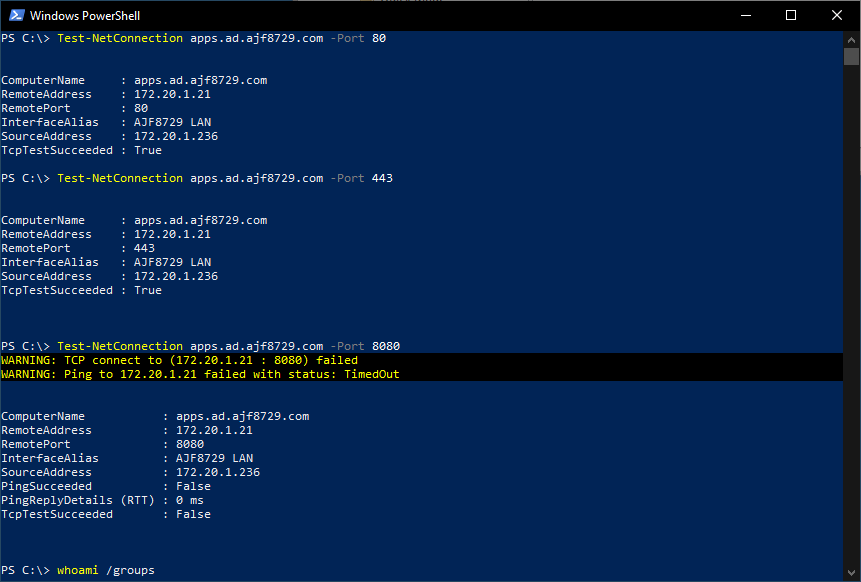
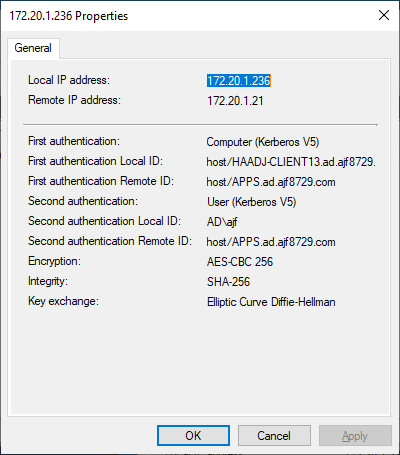
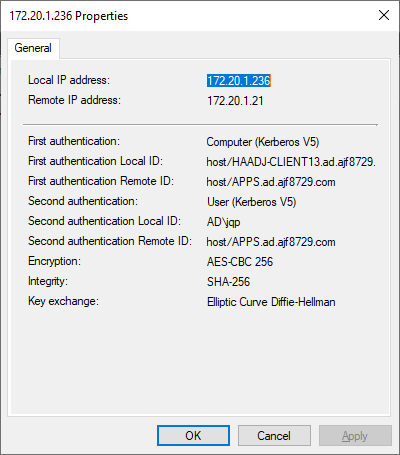
As you can see in the above screenshot, I was able to connect to ports 80 and 443, but not 8080, as my user account is not a member of the group defined in the firewall rule. I can view the firewall management console (wf.msc) and view the current main mode and quick mode associations to verify that sessions were started, using the computer and user Kerberos identities. Even though I could not successfully access the port, an IPSec session was still negotiated, which is expected behavior.
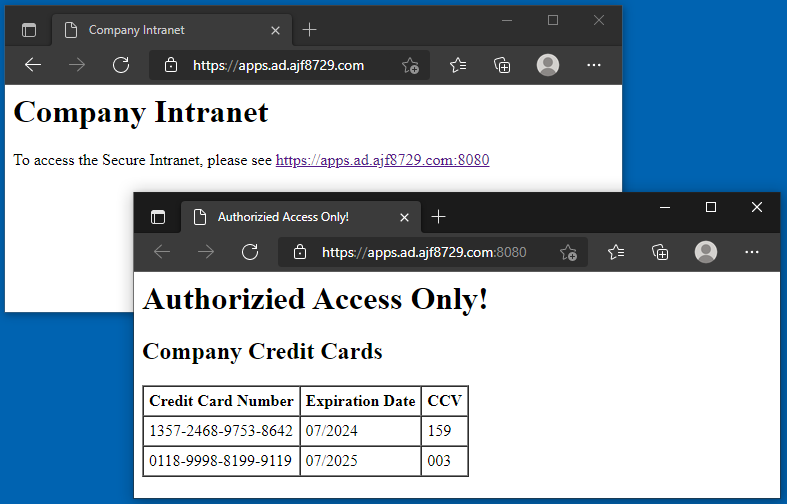
If I log out and log back in with an account that is a member of the defined security group, I can perform the same test, and see that I am able to connect to port 8080 this time.
Finally, accessing the sites directly in a web browser verifies that access is working as expected. Now you know why access to port 8080 requires identity-based access control!
Summary
At this point, a service has been secured to require authentication, and utilized a security group to define who is allowed to connect. This is a much stronger configuration than simply allowing access by IP address, as we’ve now tied the access back to a user identity. If the authorized user logs into a different computer, or from a different location, they’ll still be able to access resources. This configuration can be expanded to other servers as necessary, using varying levels of authorized users or computers as deemed fit. If the goal is to only allow access from domain-joined endpoints, simply leave both of these options as default.
This configuration can also be utilized in the reverse of the above, to secure and authenticate remote client access from management servers.